Introduction
Welcome to our new WordPress tutorial series, where we’ll explore real-life scenarios and their solutions, drawn from my experience with clients. In this in-depth guide, you will learn how to add a guest author profile on WordPress.
My client, a not-for-profit art organization, faced with the time-consuming task of manually creating new user profiles for each guest author. This has been a thorn in their side, distracting them from their primary mission – promoting the arts. However, like any good story, there’s a happy ending – a solution to this problem exists.
The Importance of Crediting Your Authors
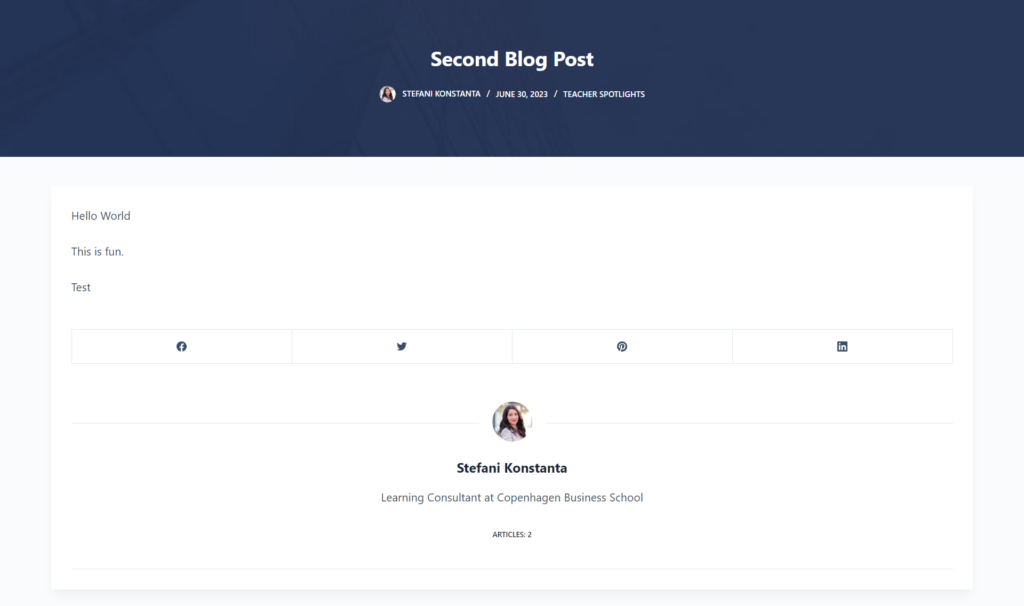
The importance of acknowledging your authors cannot be stressed enough. It not only instills a sense of ownership among your team but also enhances your site’s credibility in the eyes of your audience. It’s all about saluting their hard work and clarifying who is voicing the thoughts. Additionally, many themes, such as Blocksy, come with built-in author displays that automatically recognize and exhibit author information in a dedicated box, with minor customizations required (see screenshot below).
The Pitfalls of Creating Separate Accounts for Guest Authors
While it might seem like a good idea to create individual accounts for guest authors – all you need is their email and username, right? Well, it’s not that simple.
Firstly, as the site owner, you’re well-versed with your website’s format and how WordPress functions. Giving guest authors access and expecting them to post content themselves introduces a myriad of challenges. Plus, there’s a proofreading and approval process to consider. When you add all of this to your workflow, the process becomes cluttered with silos. It’s often more efficient to create profiles for them and upload their contributions using your style and formatting.
I personally use Elementor (affiliate link) as it offers immense flexibility in customization along with the option to add custom dynamic fields. This allows me to design a blog post template that can automatically show the author, eliminating the need for manual input every time a blog post is written.
The Knight in Shining Armor – PublishPress Authors:
After extensive testing of various plugins, PublishPress Authors (not an affiliate link) emerged as a clear winner. The plugin is lightweight, and its fundamental features allowed me to solve the problem without upgrading to the pro plan.
Getting Started with PublishPress Authors:
PublishPress Authors is a fantastic plugin designed to make your WordPress journey much smoother. This tool enables you to assign multiple authors to a post, exhibit author information, and customize how author details appear on your site.
Installing and Activating the Plugin
From your Dashboard, navigate to your plugins page and select “Add New”.

Your plugin database will appear. Search for “Publishpress Authors”, find the plugin, and click install and activate.

Configuring the Plugin Settings
Out of the box, PublishPress comes with features that may not be universally applicable.
General Settings: I will only be using the plugin for the blog posts of my website, therefore, that’s how my general settings currently look like:

Author Boxes: By default, the author box is enabled under the blog post. Since I have my own design, I chose to disable mine.

These are the crucial settings you need to configure. There are other features like Author Pages, essentially a page showing all posts by a particular author. I use Elementor, which already allows such customization, hence my choice to skip this step. However, if you’re seeking a free option, this feature is definitely worth exploring.
Crafting Your First Guest Author Profile
Now, we’re set to create our first guest author profile. Head to the Authors page and add your guest author’s name.

Hover over the new user you’ve created, and you’ll see an “Edit Author Profile” option. Click it to personalize the name, add a photo, bio, and relevant links. Click “Update”, and voila – your changes are saved!

Assigning Your Guest Author to a WordPress Blog Post
Now that your guest author profile is ready, it’s time to associate it with a blog post. When you create a new blog post or update an existing one, you’ll have the option to select the author on the right-side menu of the blog post.

Conclusion:
And just like that, we’ve discovered a seamless way to add custom author profiles without the need to register a new user each time. It’s about streamlining your process, giving credit where it’s due, and maintaining the professionalism and credibility of your site. So, go ahead, simplify your guest author handling with PublishPress Authors!